Starting a blog is one of the easiest, most accessible ways to launch your own business and earn an income online (from anywhere in the world). You don’t need to be a professional writer or web developer—and you don’t need any credentials, years of experience in your field, or a degree in order to blog and become successful with it. In this guide I will show you how to start a WordPress blog and grow it to your first 20,000 visitors.
This guide is made especially for beginners. I will walk you through each and every step to start a WordPress blog that is ready to share with the world.
Before we start there are three definitions you need to know
Hosting: Web hosting is a service that provides the necessary infrastructure and storage space for websites to be accessible on the internet.
Domain: A domain is the unique address that identifies a website on the internet, allowing users to access it by typing in the domain name in a web browser.
Blogging platform: WordPress – the software you will use to build and manage your blog.
Disclosure: At Media Dimes, I believe in transparency and honesty when it comes to providing information and recommendations to our valued visitors. With this in mind, I want to disclose that my website may contain affiliate links. These links enable me to earn a commission when you make a purchase or take certain actions through them without any cost to you.
How to start a WordPress blog
I use simple steps to start a WordPress blog….
This is very straightforward and I work off these steps when starting out. Don’t use free hosting, always get your own domain and hosting.
- Find a hosting
- Pick a domain name and install WordPress
- Write your first post
- Promote your blog
In this particular example, I will be using Hostinger for the hosting and show you how to set it up.
I will use Hostinger for several reasons such as:
- Cheap, so it’s good for people on a tight budget
- You will get a free domain name (normally 15$ a year)
- Reliable and stable hosting
- Easy to use
- Excellent customer support
Step #1: Visit Hostinger and pick your hosting plan
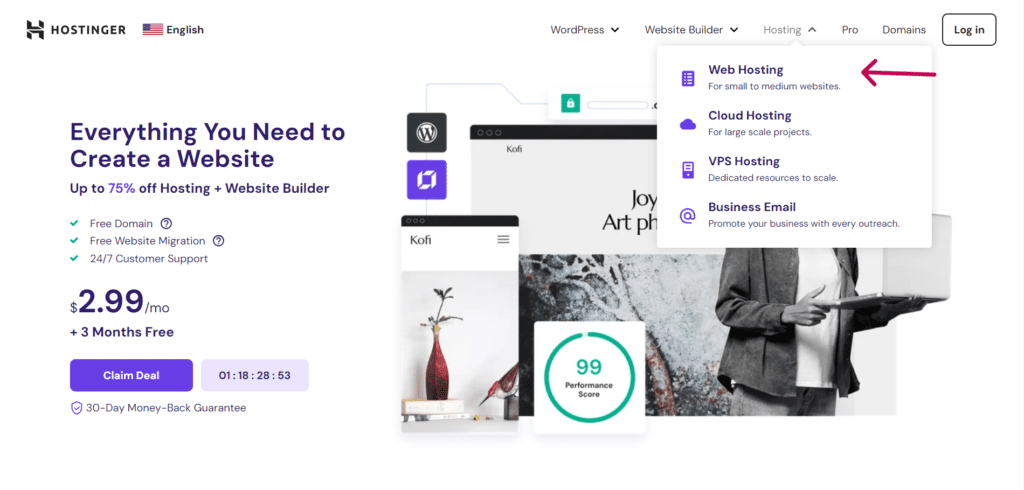
Scroll down to pick a hosting plan
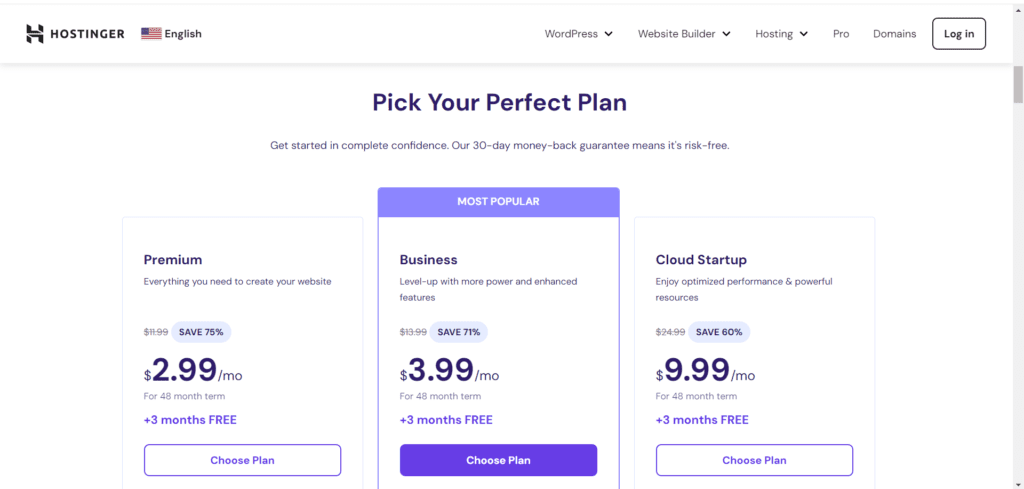
The premium plan is available only for $2.99 per month (for 48 months term). This is where most new bloggers should start . If you have different needs or are managing numerous sites, there are other options available.
I recommend opting for Premium Shared Hosting or Business Hosting, because that’s the least you have to pay to also get a free domain.
Note: Hostinger often offers promotions, coupons and special offers to customers during their initial term. Special offers are limited-time promotional prices that are available to new customers and are valid for the Initial Term only, and not for successive or renewal periods.
Once you’ve selected a plan, you’ll need to complete the checkout process > create an account > fill up your payment information > review your order > then click “Submit Secure Payment”. You’ll then receive a receipt from Hostinger with all the details for your web hosting subscription.
Step #2: Choose your domain name and install WordPress
After you Finish, check out and submit your payment information, then you’ll be taken to Hostinger’s setup wizard.
The Hostinger wizard only requires you to answer three short questions to customize the setup process to your preferences and level of comfort.
It offers you useful support if you’re a beginner site builder so you don’t have to figure things out too much on your own. Experienced users will find that it handles all the necessary details and then moves aside to allow you to create the vision in your head.
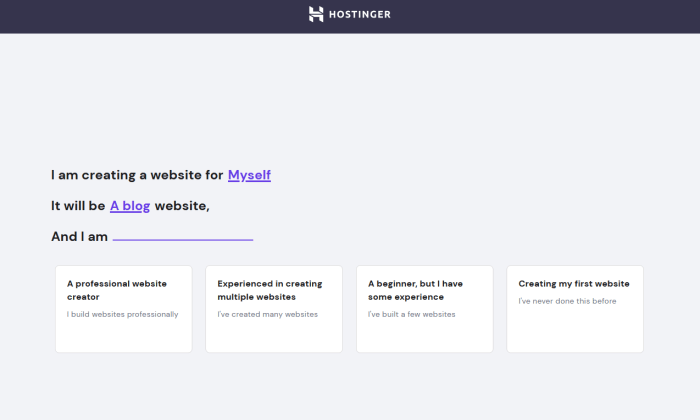
For the sake of this guide, I’ve chosen to go through the rest of the setup as a beginner who is building a blog for myself. Next, you’ll choose the platform you want your site to run on.
Now that we’re discussing creating a WordPress blog, feel free to choose WordPress from the menu on the left.
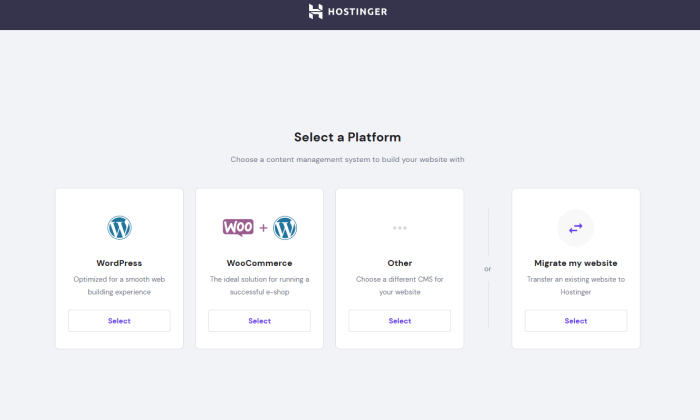
When you click Select under WordPress, Hostinger will display a field for you to create a new WordPress account or sign into your existing one. You don’t even have to leave the wizard to complete that step.
Hostinger even helpfully offers a selection of site templates to start from.
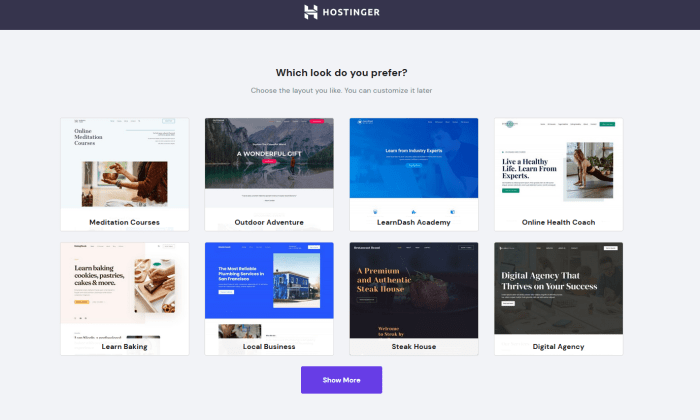
If you’re not ready to commit to a theme just yet, you can always skip this step and go to the text link that’s right below the Show More button.
Next comes a crucial step. You’ll secure your WordPress blog’s domain.
Remember this comes free with your Hostinger Premium Shared Hosting plan.
Click Select on the left underneath Buy a Domain. A field will appear below where you can search for available domains.
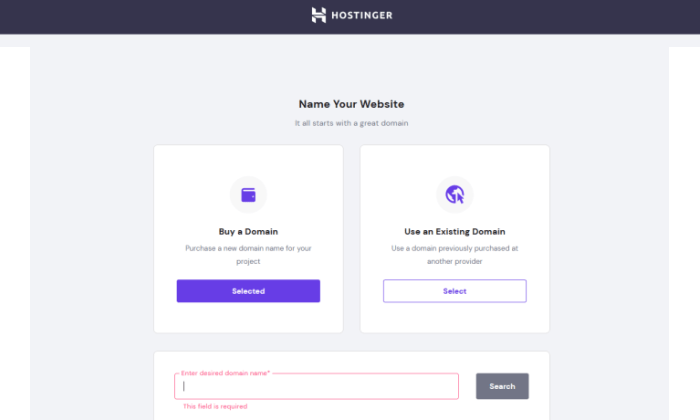
Hostinger will take a couple minutes to install WordPress for you and connect your domain to your new site. Once that’s finished, you’re taken to your account dashboard.
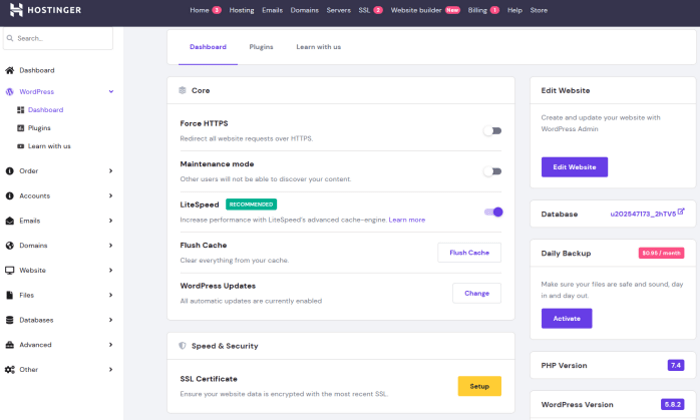
You can work on your WordPress site by clicking WordPress in the left-hand navigation menu in your Hostinger account dashboard.
That will show you the current version of WordPress installed, any issues that need attention (such as an SSL certificate needing to be setup, as you can see in the image above), and much more.
Here are a few key features to help you navigate the left-hand side menu of your WordPress admin area:
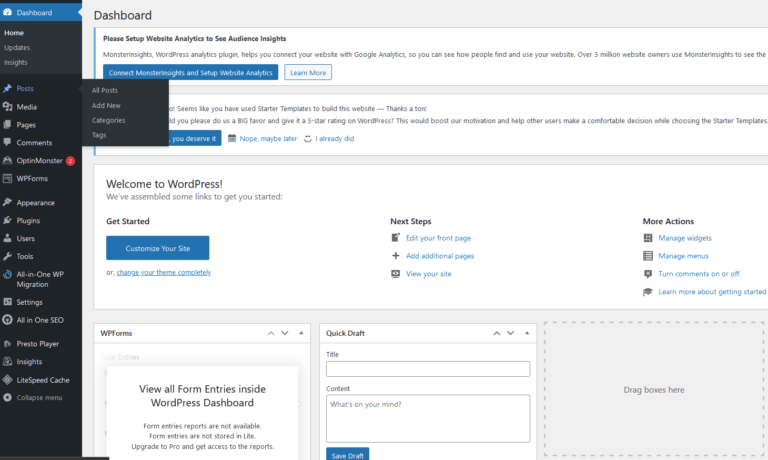
Posts: Create, modify, read, and oversee your blog posts.
Media: You may organize and upload the pictures and videos you want to utilize in your pages and blog articles.
Page: Make and personalize each of your pages, such as the About Me or Contact sections.
Comments: See, accept, and handle every reader comment to foster a vibrant conversation on your blog!
Appearance: To change the appearance of your Bluehost WordPress blog, search for, install, and set up new WordPress themes.
Plugins: Plugins enable you to enhance your blog with additional features like contact forms, clever SEO tools, security and backup capabilities, and much more.
It’s a lot to take in at first, but just keep it cool and explore your dashboard one thing at a time.
Step #3: Write your first blog post
With your plans in place, you can confidently write your first blog post.
You can start writing a post once you’ve decided on a topic. In the WordPress dashboard, select Posts > Add New to get started. You will get this screen:

First, check out the right-hand column. Decide when you want your post to publish and add the date. Scroll down and add a featured image and a category (if you wish).
Next, over in the left column you can add your title and start writing the body of the post. If you click beneath the center of a block, you can see the option to add media such as video and photos.

Here are a few quick tips for writing blog posts that look good on mobile devices:
- Don’t write paragraphs longer than two or three sentences.
- Keep the length of your sentences to 20 words.
- Use H2 headers to divide parts.
- Keep the text between H2 headers under 300 words.
- To keep things interesting, make use of lots of images and bulleted lists in your content.
These practices are all great for SEO as well. When you’ve finished writing, hit the “Publish” or “Schedule” button on the upper right of the screen. Congrats!
Step #5: promote your blog
Writing excellent content and designing a beautiful blog are only the beginning. You will need to dedicate some time to blog promotion in order to attract readers, particularly in the beginning.
The following strategies can help in increasing the number of people who see your blog. Try out a few different strategies to see which ones work best for you; you don’t have to utilize them all.
Comment on other blogs
Look for other blogs in your niche and comment on them. Introduce yourself and write thoughtful, enlightening thoughts in the comment area. You can leave a link to your blog with many of them. Soon after building relationships with well-known bloggers in your niche, you will find yourself included in their ranks.
Post regularly
Publish content frequently. Make an editing schedule and follow it. A decent blogger starts off by posting once a week at the latest.
If you have long lapses between posts, your followers will drop off and your growth will be severely hampered.
Maintaining a posting schedule is difficult, but it’s something you must do.
Growing An Email List
Send out your fresh blog content to your email list, and your regular readers will spread the word. Your new content will be seen by more people as a result of this.
I use GetResponse for email marketing. This method isn’t free I’ve added it as a bit of a bonus but GetResponse is free for 30 days.
Check my GetResponse review to learn more.
Interact with your visitors
When your readers leave comments on your posts, always engage with them. Reply to their comments and questions, give them “likes” and affirmations. When it is obvious that the author cares about his/her community and readership, visitors are naturally encouraged to return.
Collaborate with influencers
Identify influencers in your niche and collaborate with them to promote your blog. This can include featuring them in your blog posts, hosting joint webinars or podcasts, or sponsoring their content.
How to start a WordPress blog: FAQ
Is Hostinger good for blogging?
Hostinger is the greatest option for beginning your first blog due to its user-friendly interface, simple sign-up process, and highest-rate customer care. You will also get excellent value for your money because you get a free domain name for the first 12 months. WordPress, the greatest and most widely used blogging platform on the planet, also suggests Hostinger as a blog hosting company.
Is Hostinger right for beginners?
Beginners are particularly drawn to Hostinger since it provides a simple and rapid setup process for all the essential elements needed to launch a WordPress blog website. Beginner bloggers may easily and quickly start a blog with plans starting at $3.0per month, 24/7 live chat assistance, a free domain name included for the first year, and a free SSL certificate included.
Is WordPress really free?
Yes. The same program is available under two different names: WordPress.org and WordPress.com. You may develop and maintain your blog or website with WordPress.org, an open-source program that you can download and install on your web hosting account. With WordPress.com, you can create a blog without registering for blog hosting, but you won’t be able to keep your blog’s website or domain name.
How much does Hostinger cost per month?
Hostinger offers shared hosting plans that range in price from $2.99 to $9.99 a month (for 48 months term). Check their plans here.
Do I get Hostinger or WordPress first?
If this is your first blog, sign up for Hostinger first. Then use Hostingers WordPress installation process to set up WordPress for your self-hosted blog in one click.
How do Hostinger and WordPress work together?
Hostinger offers a web hosting account and WordPress is a content management system. You need a host like Hostinger in order to have a live website.
How often should I blog?
If your goal is to eventually make money from your blog, you’ll want to start blogging as often as possible – at least once per week. Blogging can be casual if your goal is solely for personal pleasure. But if you’re seeking a large audience and wish to become a leader in your field, blogging weekly is a must.
Final words
Starting and growing a successful blog requires dedication, consistent effort, and a genuine passion for your chosen topic. By following this step-by-step guide, you can lay a solid foundation, create valuable content, promote your blog effectively, and ultimately cultivate a thriving online presence. Embrace the journey, remain authentic, and continually seek opportunities to evolve and engage with your audience.
Happy blogging

